
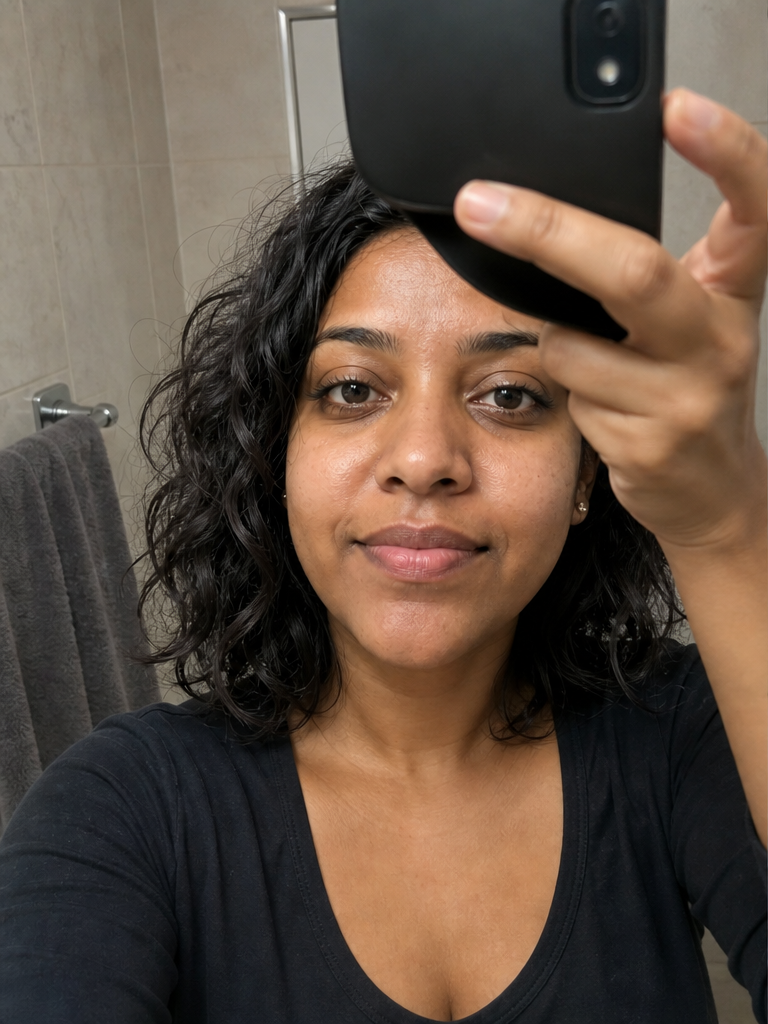
You prop the phone on a stack of library books, set the timer, run into frame, and the stack slides the second you turn around. Or you ask a stranger, then spend the shot hoping they framed it right (they didn’t). Or you give up and take the tenth arm’s-length mirror selfie, which somehow looks worse than the nine before it. The problem is not your face. It is that you are missing a photographer, and you have been trying to be the subject and the camera operator at the same time.
You do not need to hire one. Three repeatable setups do the photographer’s job for you, none of them needs a tripod you do not own, and when you cannot be bothered to stage anything, one selfie plus AI renders the shot.
Why your own photos come out worse than you expect
Taking your own photo is not a niche problem. A 2025 PhotoAID survey of just over a thousand US adults found that 60% take a selfie at least once a week, rising to 84% among Gen Z. Most of those are the arm’s-length kind, and that is the first thing working against you.
A close phone distorts your face. A 2018 Rutgers and Stanford study in JAMA Facial Plastic Surgery measured a nose looking roughly 30% wider at selfie distance than from a few feet back. When you hold the camera, you are stuck at the one distance that flatters you least, and you are using the hand that should be free to pose.
So the fix is mechanical, not cosmetic: get the camera off your hand and a few feet back. That single move is what every setup below is built to do.

The three self-capture setups
Pick the one that fits where you are. Each does the same job (camera placed, hands free) in a different situation.
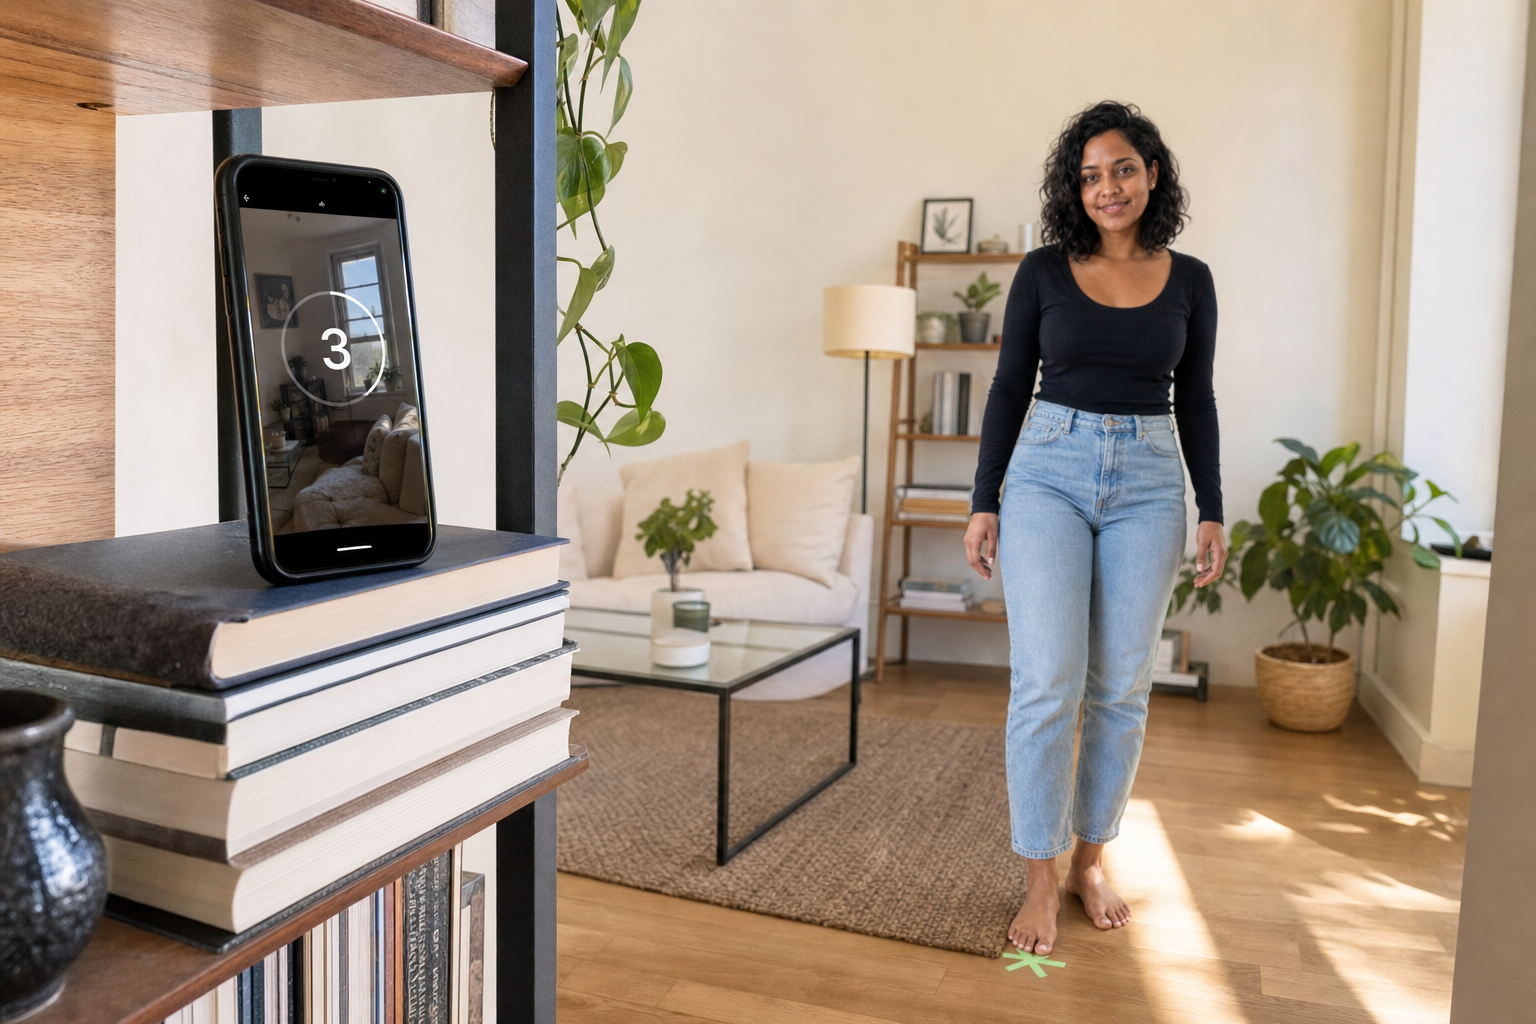
Setup 1: Phone and timer at prop-height
The no-gear default. Prop your phone upright at roughly chest height: a shelf, a windowsill, a stack of books against a wall. Chest height matters, because a phone on the floor or a low table shoots up at you and a phone overhead shrinks you.
What to do: open the camera, set the self-timer to its longest delay with burst mode on, tap, and step to a spot you can see in the frame. Put something on the floor to mark where to stand so you are not guessing.
The pitfall: the lean. Books slide and shelves are rarely flat to you, so the phone tips and you get a crooked horizon. Wedge the bottom edge against something solid and check the first frame before you commit to twenty.
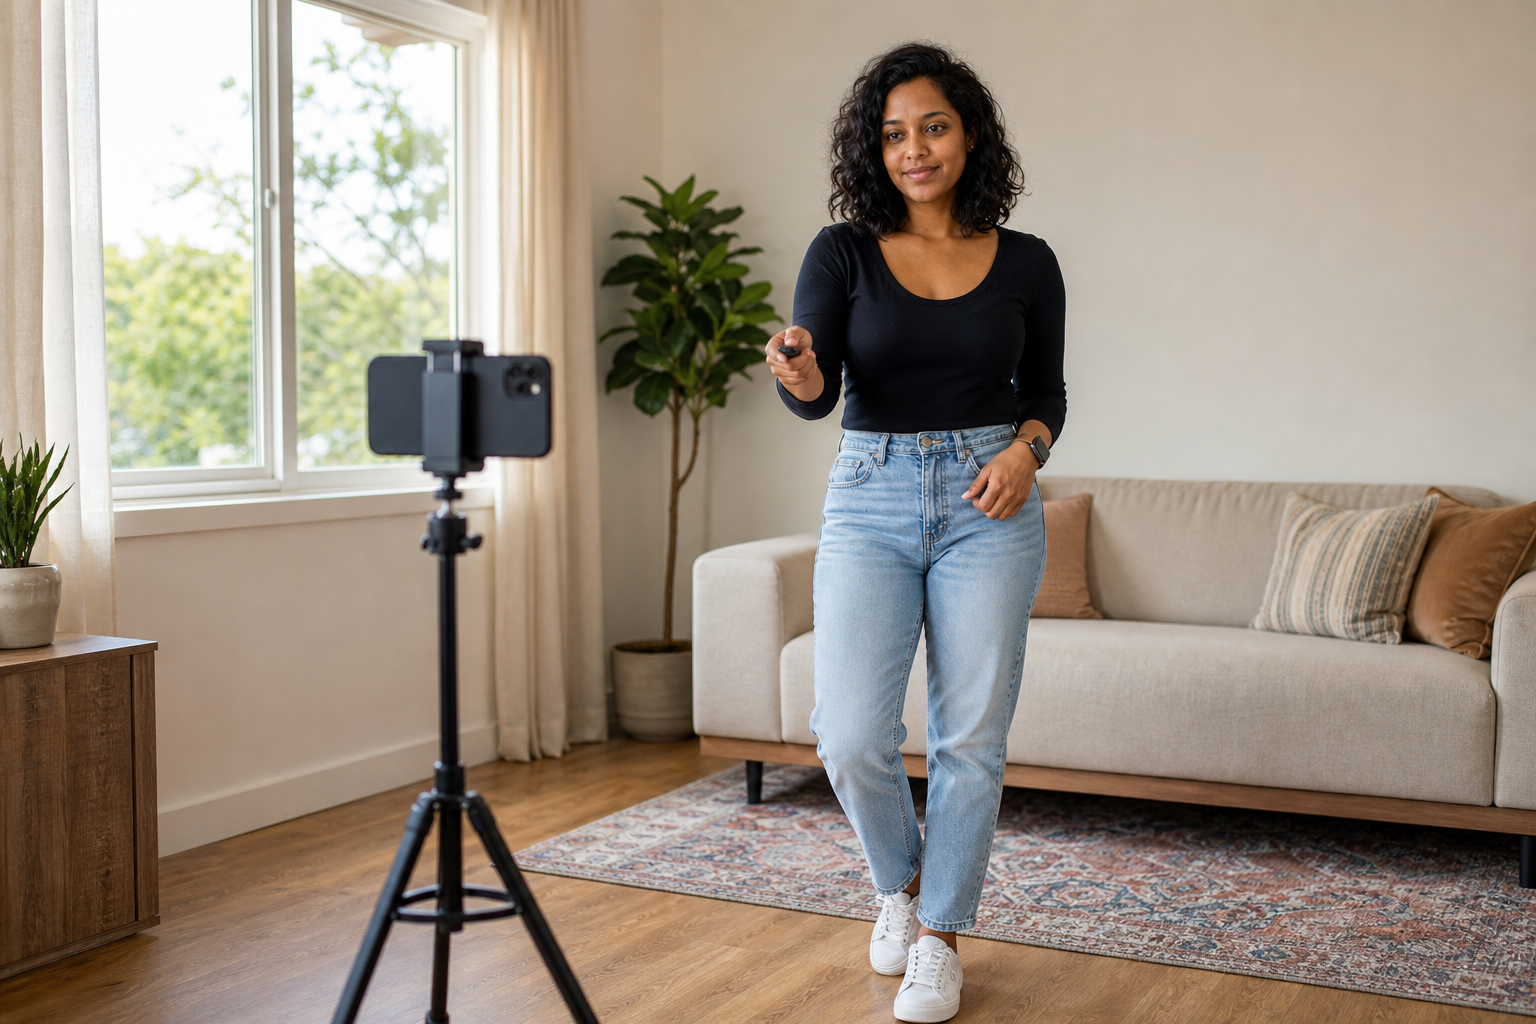
Setup 2: A tripod or a remote
The upgrade that costs about the price of two coffees. A palm-sized phone tripod fits in a bag and stands where no shelf exists. Pair it with a shutter remote, or use what you already own: an Apple Watch or most earbuds will trigger the camera, so you can shoot the instant you are ready instead of racing a countdown.
What to do: set the tripod at eye level, frame yourself once, then trigger each shot from your hand while you adjust. You get to react to what is working instead of running back to check.
The pitfall: forgetting you can move the camera. People set the tripod once and freeze. Reframe it two or three times for different distances and heights; the variety is where the keeper hides.
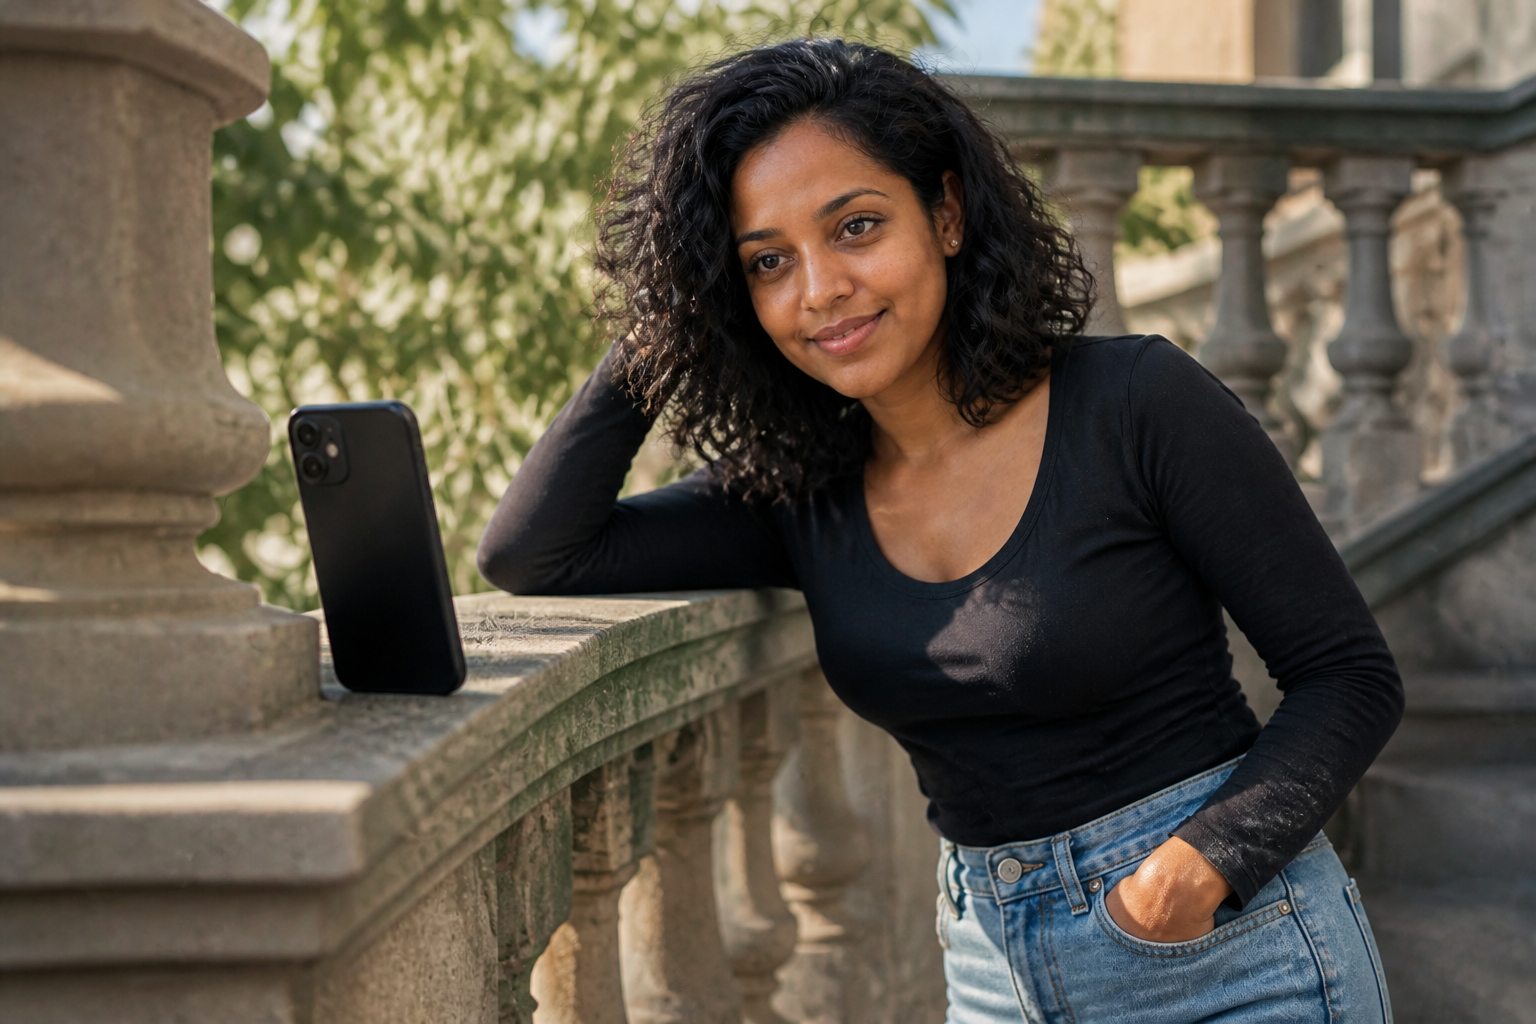
Setup 3: The lean-and-frame
For when you have no tripod and no surface at the right height, which is most of travel. Wedge the phone somewhere solid (a stair railing, a fence gap, a ledge, a bag propped against a wall) aimed at a spot, set the timer, and then lean into the composition that is already framed instead of building the frame around wherever you end up.
What to do: frame the empty spot first, lock focus on it, then occupy it. If a stranger is around, this is also the script that gets a usable favor: pre-frame the shot, hand them the phone, and ask them to only tap. You remove the one variable they get wrong.
The pitfall: a phone that falls. Test the wedge with a gentle push before you walk away from it.
One short paste-ready habit a week, the kind you can use on a Tuesday. Subscribe to the newsletter and the first thing you get is a free kit of twelve copy-ready prompts.
Placing the camera is half of it
The setups solve the photographer problem. They do not, on their own, make you look good in the frame, and that is a separate, learnable skill. Keep the camera at eye level or slightly above, turn toward the biggest soft light in the room, and give your body something to do instead of standing at attention.
That is the short version. The full version is its own guide: how to be photogenic covers the angle, light, and expression levers, how to pose for pictures covers what to do with your body, and if you want specific shots to copy, photo poses and ideas lays them out, and how to take a good selfie covers the front-camera version specifically. Place the camera with the setups here, then borrow the looking-good part from those.
The shortcut for the days you can’t stage anything
Some days there is no shelf at the right height, the light is flat, and you are not about to do a twenty-frame timer run in public. That is the case the studio is built for. Upload one clear selfie and generate yourself into the shot, in good light and a real setting, while it keeps your actual face. It is the most literal version of “without a photographer”: no tripod, no timer, no stranger, just the photo.
For reference, that is replacing real money. A portrait session runs around $250 and up according to Thumbtack’s 2025 pricing, with photographers charging on the order of $150 an hour. The setups above cost nothing; the AI route costs less than the session and works on the days the setups can’t.
FAQ
Q: How do you take good pics of yourself?
A: Get the camera off your hand and a few feet back. Prop your phone at chest height on a shelf or a stack of books, set the burst self-timer, and step into a marked spot. The distance fixes the distortion a close phone adds, and the timer frees both hands so you can actually pose. Take twenty frames and keep one.
Q: What is the 80/20 rule in photography?
A: It is the loose idea that about 80% of a strong photo comes from a few fundamentals (light, distance, and a relaxed subject) and only about 20% from gear. For taking photos of yourself it is freeing: you do not need a better camera, you need the phone placed a few feet back in good light. The setup matters far more than the device.
Q: How can I make myself more photogenic in my own photos?
A: Looking photogenic is a separate skill from capturing yourself, and it comes down to angle, light, and expression. Keep the camera at eye level or slightly above, face the nearest window, and time a real smile instead of holding one. The capture setups here place the camera; the looking-good part is its own short guide.
Q: How do you take photos of yourself while traveling alone?
A: Use the lean-and-frame or a small phone tripod. Wedge the phone in a railing or ledge aimed at a spot and step into it, or carry a palm-sized tripod and trigger it with your watch. When neither is practical, one clear selfie can be turned into a full travel shot with AI, which is the only option that needs nothing but the phone in your hand.
Key Takeaways
- The problem with your own photos is a missing photographer, not your face. Every fix is a way to get the camera off your hand and a few feet back.
- A close phone distorts you: a nose looks about 30% wider at arm’s length than from a few feet back (JAMA, 2018). Distance alone is a real upgrade.
- Learn three setups: phone and timer at chest height, a small tripod with a watch or earbud remote, and the lean-and-frame for travel.
- Placing the camera is only half. Borrow the angle, light, and expression part from a photogenic guide once the camera is set.
- On the days you can’t stage anything, one selfie generates the shot with AI for less than the roughly $250 a portrait session costs (Thumbtack, 2025).
Take twenty tonight
You do not need a photographer, a studio, or a tripod you do not own. Prop your phone on a shelf at chest height, set the burst timer, mark your spot, and take twenty frames of yourself. Delete nineteen. The one that is left is the proof you never needed anyone else to hold the camera.